
Your shopping cart is empty.
A/B Crossfade Assign, Crossfader and Cue Volume

Last updated on October 12 2020
Hi, this is John from Remotify, I'm going to show you the three new mapping types that we've added in Control Surface Studio version 2.5.5.
A/B Crossfade Assign, Crossfader and Cue volume. To see these controls in Ableton Live you just need to click the “x” control.
A/B Crossfade Assign: Introduction
I’ll start by adding a new script in Control Surface Studio, and showing you the Crossfade Assign options, so let's switch over to control surface studio.
Currently I’ve got no scripts in here, I’ll just add one, you can see that my VMPK controller template has been added automatically, that's the one that I want to use so we can continue.
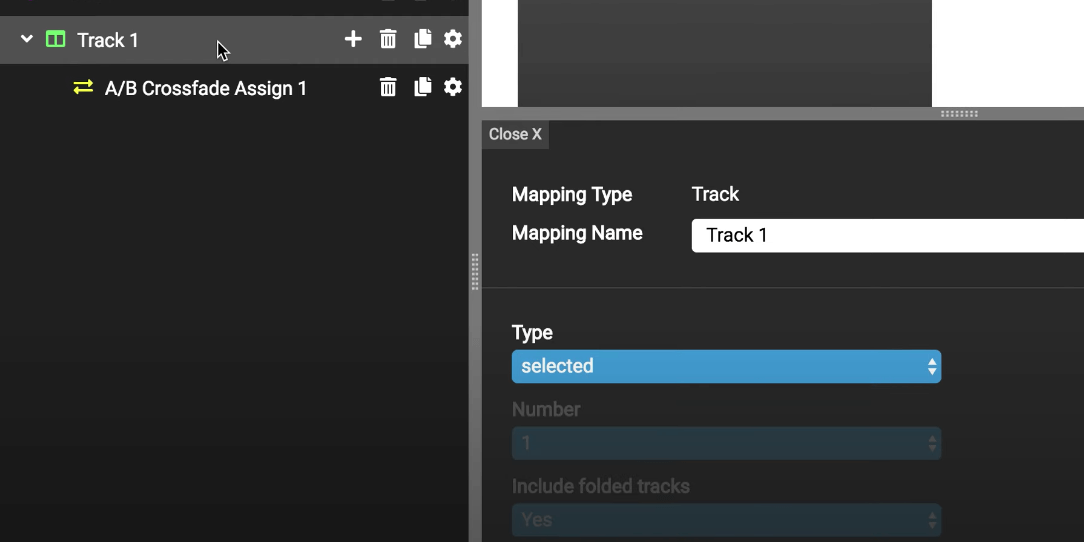
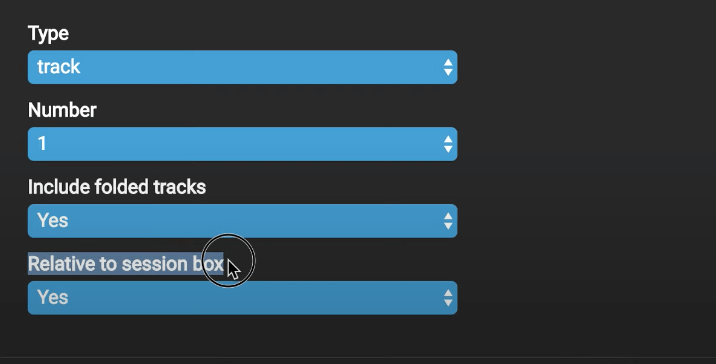
I’ll add a new mode, and then in that mode, I need to add a track. For the the Track mapping, we’ll just leave it set to control track one, which if I switch over to live will control track 1.
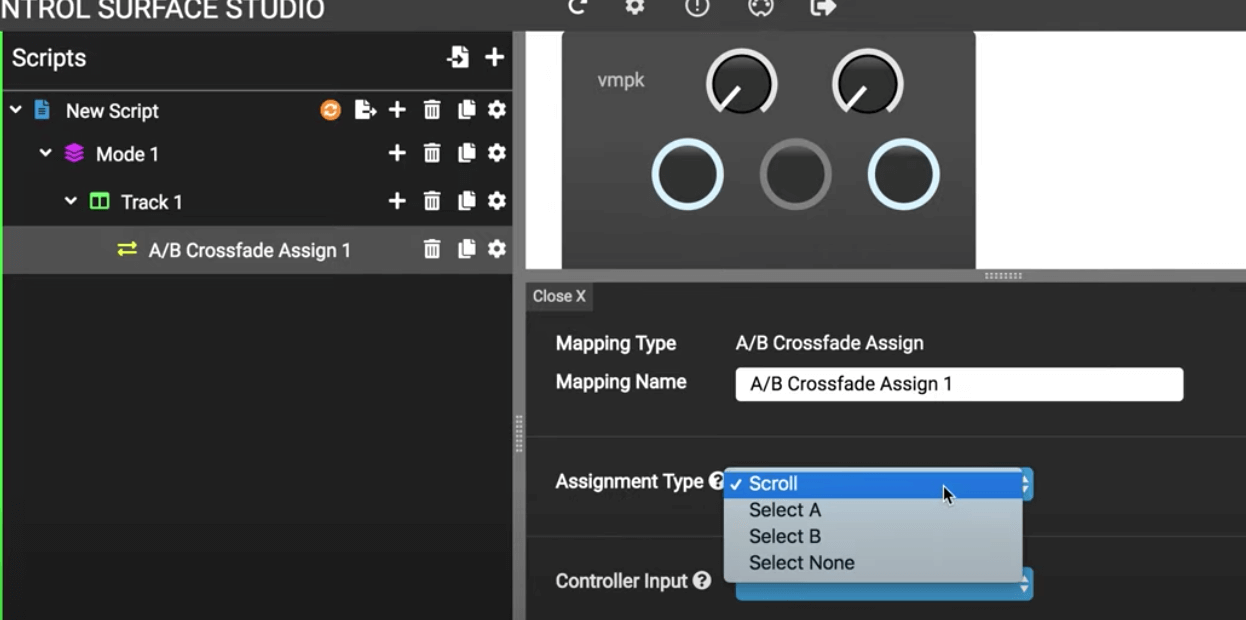
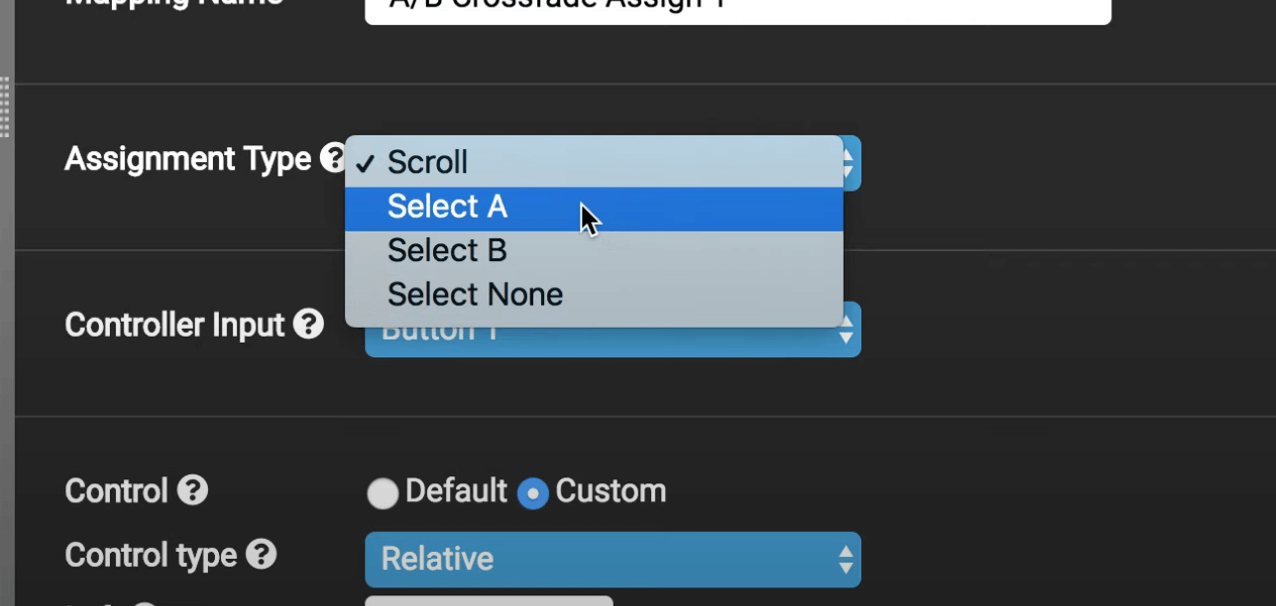
I then need to click on the mapping icon for the track, and you'll see this new mapping type A/B crossfade assign. Select that, and now in the settings form for it you can see that there's this option “assignment type”, and if I expand it, we have four options in here. Scroll, Select A, Select B and Select None. I’ll show you the scroll option first…
A/B Crossfade Assign: Scroll
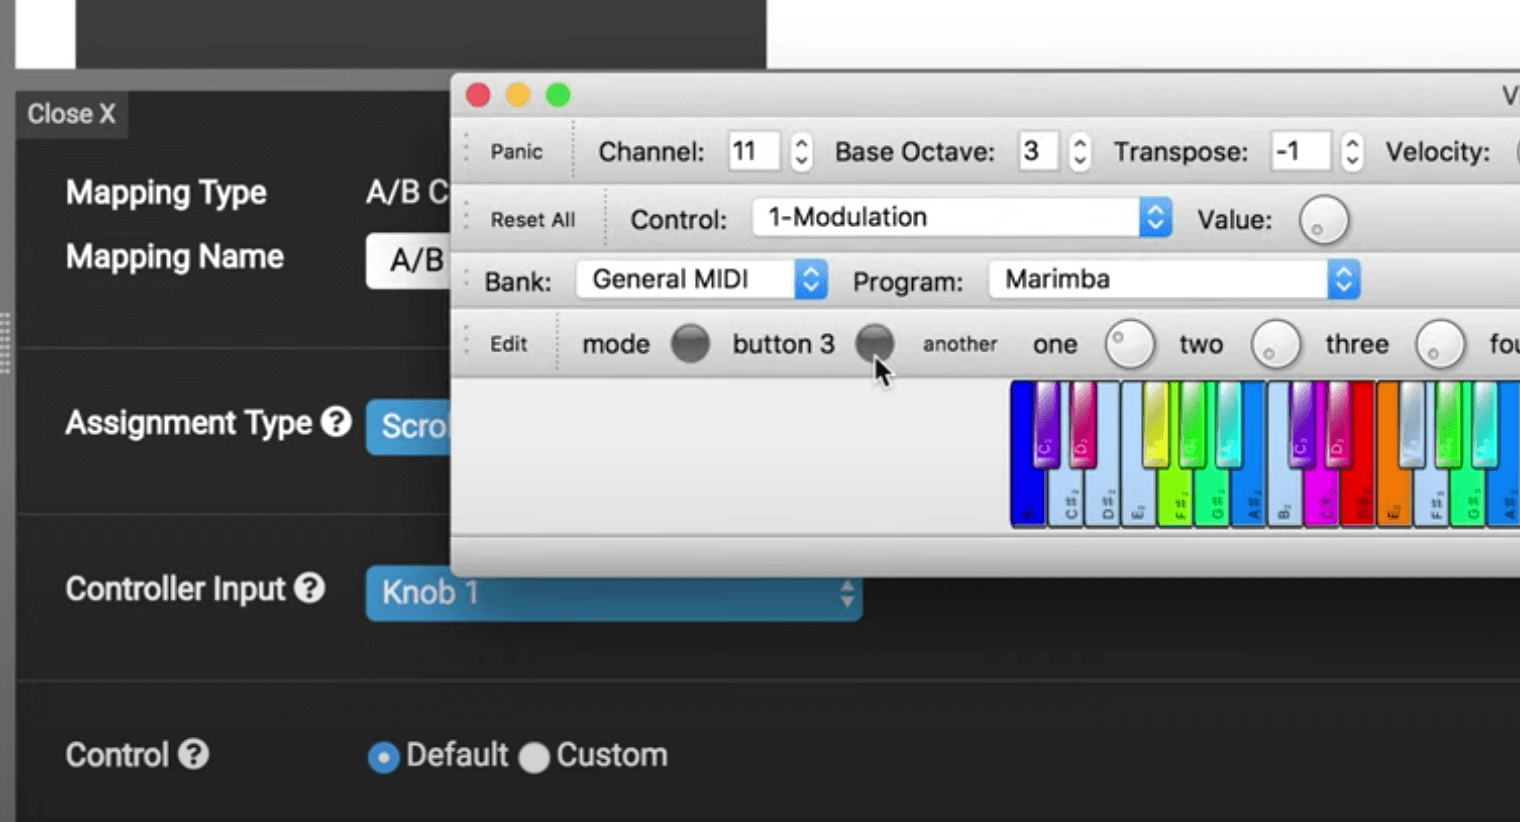
I will assign this mapping to control “knob 1” on my midi controller.
For this tutorial I’ll be using the “virtual midi piano keyboard” midi controller. It acts exactly the same as a physical midi controller, but it's just easier for me to show you in this tutorial.
Okay so in the mapping we'll just leave everything else set to default, and I’ll install that into live. (message in CSS: New script installed successfully).
If I switch over to Live and reload, the changes take effect. If I get the controller up, when I when I turn the knob you'll see that the A/B selection changes.
Uh, oh wait a minute let me let me turn the feedback off. Yeah so, it's best to, well for this midi controller anyway, um, to turn the feedback off, just because it does weird things like you've just seen. (edit: this is because the VMPK controller’s knobs change position based on the velocity feedback received. A/B crossfade assign only sends 3 velocity values as feedback which messes with the positioning, see the LED feedback section for more details on this).
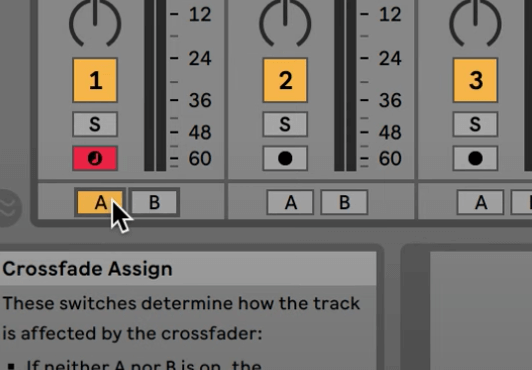
Okay so I’ll reload Live again. Now when I move “knob one” you will see that the crossfade assign changes. When I move it to the left “A” is selected, when I move it to the center nothing is selected, and then when I move it to the right “B” is selected.
And you can do the same with a button, just change controller input to “button one”, install that into Ableton Live / reload Live, and now when I press button one, you should see the same functionality, It's scrolling through the options, and with the current option of scroll, and the default control what it does is it cycles through A, None, and B continuously in a loop.
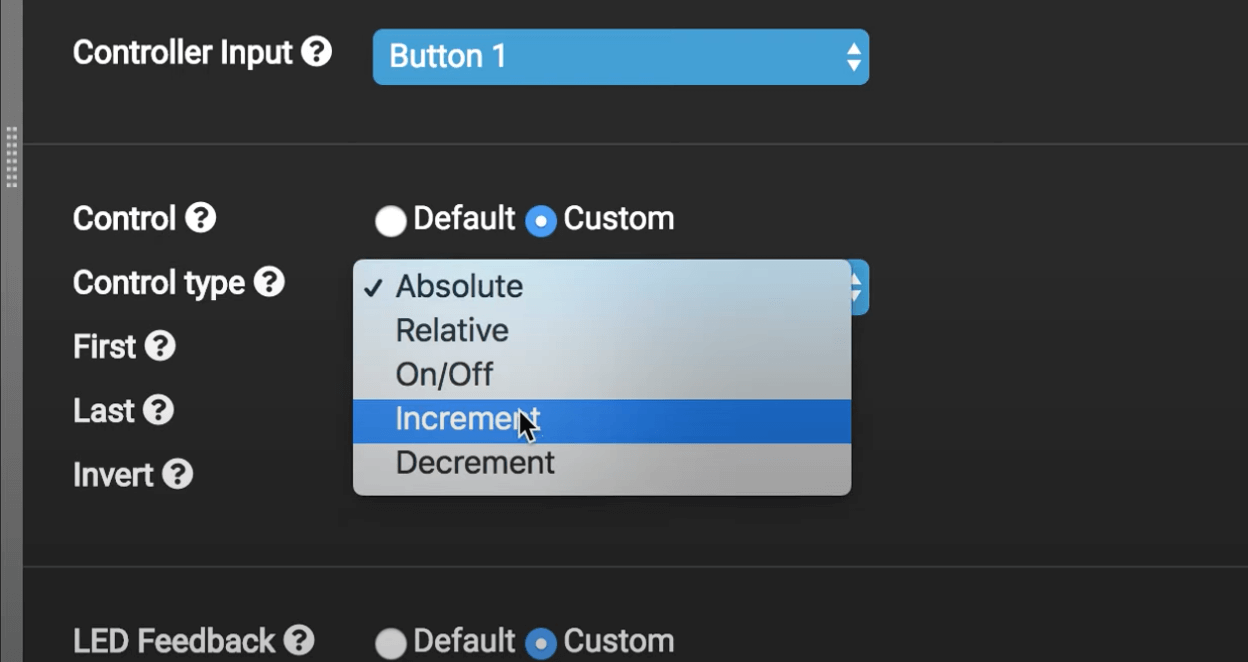
And you can actually change that so, lets say I just want it to go from “A” to “None” to “B”, and then stop, I can do this by selecting the “custom” control option, change “control type” to “increment”. Make sure the on off velocity values are correct for the button (which they are), and I’ll change this to toggle (because it's a toggle button).
Install that into Ableton Live, and reload live, and now we are on A. Then, once it gets to “B” you can see that it stops. You could do the same but in reverse by changing “increment” to “decrement”, and it would just go from “B” to “None” to “A”, and then stop.
You could also use a “relative” input type which would be an endless encoder. They send one value continuously when you're turning the encoder to the left, and then one value when you're turning it to the right. Where as an absolute knob sends a stream of values from zero to 127. If that was an endless encoder, usually it would just send one value when I'm turning it left, and then another value when I'm turning it right. You can use that with the scroll assignment type.
A/B Crossfade Assign: Select A, Select B, Select None
Let's go back to the assignment type, we also have “Select A”, “Select B” and “Select None”. If you don't want to scroll through the three options, you can just choose a specific assignment type.
I’ll choose “Select A”, set “control” back to default, and install that into Ableton Live. Now when I press button one, it selects A, and then it does nothing else. You can do the same for select b or select none, and that obviously will work with any control type, and you can use these custom control options in the same way as I’ve just shown you.
A/B Crossfade Assign: LED Feedback
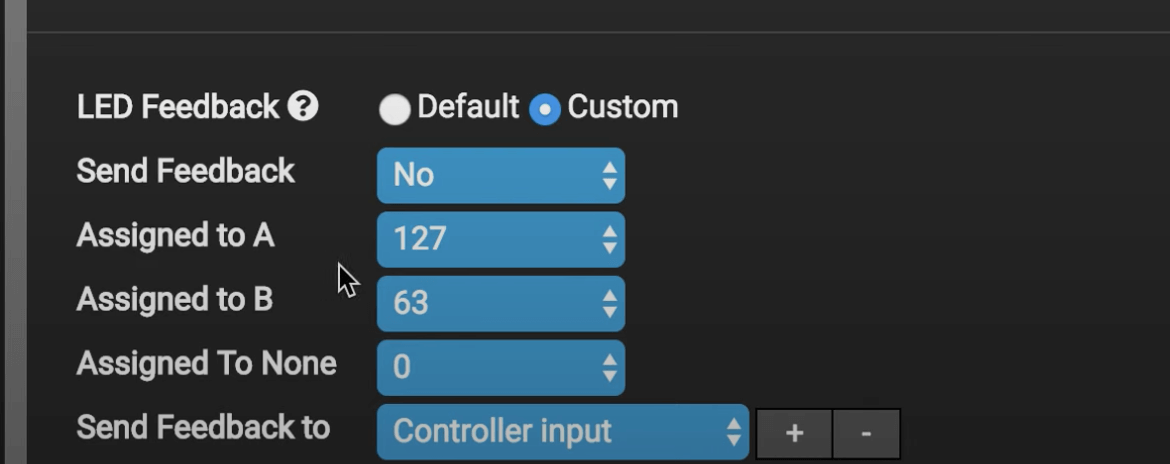
The LED feedback has a few different options compared to other mapping types, we have “Assigned to A”, “Assigned to B”, and “Assigned to None”. How this works it's quite simple really, when A is assigned it will send its velocity value to your controller input, when B is assigned it will send that, and when None is assigned it will send that one.
So, if I just quickly show you that um, I don't have a full RGB input, so I’ll just set A, and B to the same velocity value (127), None will send a velocity value of zero and then I’ll send the LED feedback to button 2 on my VMPK midi controller.
Now when I press this button you can already see that because A is selected in Live, the LED is displayed on the midi controller. If I select none, the LED turns off and if I select B it turns back on. You can control the LED feedback on your midi controller either from Ableton Live’s UI or from your midi controller (this is Bi-directional feedback).
Using A/B Crossfade Assign on the selected track
As well as selecting a specific track to use the crossfade assign on, you can of course use the “selected track” option, which works with all mapping types that are contained within the track, these are the mixer controls… volume, panning, sends, mute etc
I change the track selection to “selected” which means I’m going to be controlling the selected track. If I install that into live, and reload it, now it will control whichever track is highlighted in Live, so if I select track 2, you can see that now it's controlling track 2. Same if I move it to track 3.
Using A/B Crossfade Assign with the Session Box
You can also use it with a red box, or the “session box” is what we call it in Control Surface Studio. I just make sure “relative to session box” is set to yes in the parent Track mapping type.
I’ll then add a “Session Box” mapping type, set that to two tracks in width and one scene in height and install that update into live.
Oh, I’ll also need a way to control the session box. So, I also need to add a “session box navigation” mapping type, set that to scroll, and it can be controlled with the knob.
Now when I reload Live you'll see a red box has appeared, and I should be able to move it with this knob, and as the track is now relative to the position of the session box, when I click this button we should see track three being controlled. Yep, and if I move the session box along a bit more, now track seven should be controlled. Yep that works!
Crossfader and Cue Volume mapping types
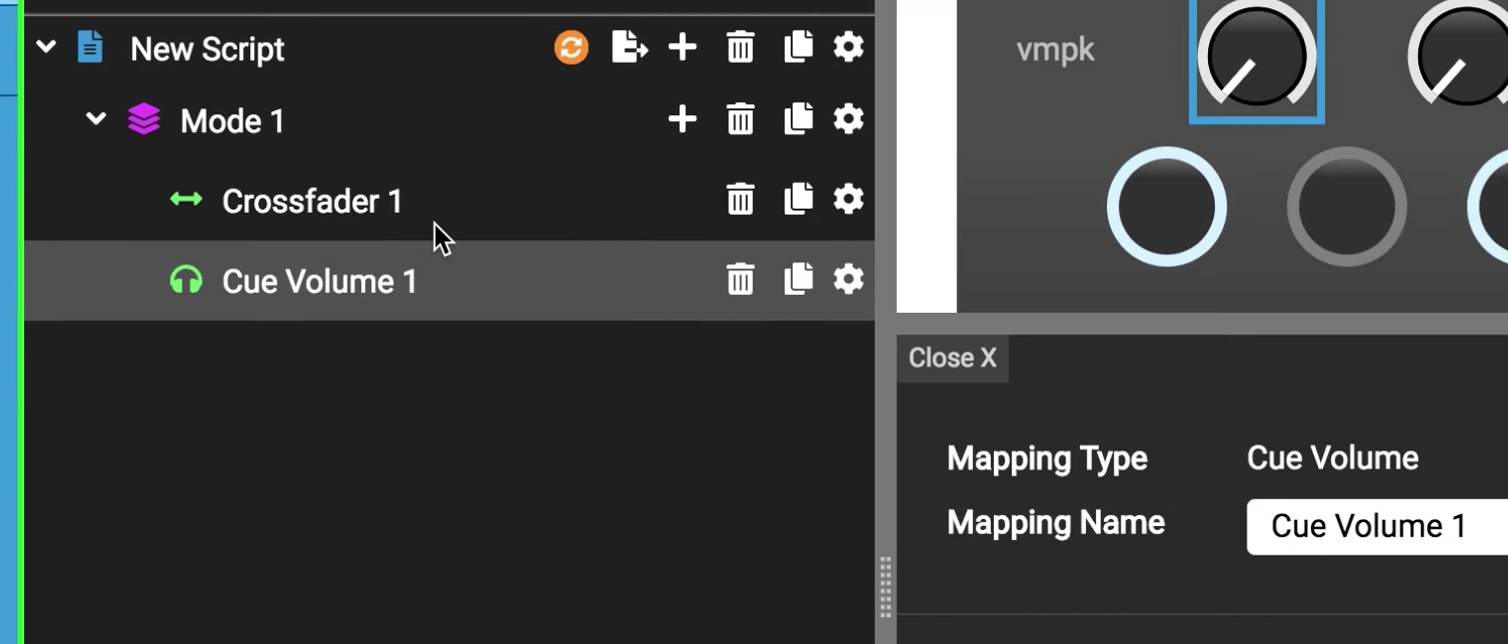
Okay so, the other two mapping types we have in this update are the Crossfader, and Cue Volume. I’ll just quickly show you those as well. They're a bit more straightforward.
These are found directly in the mode rather than inside the track, because they're not specific to a track, Crossfader, and Cue Volume. I’ll set those to be controlled by knob one (let's remove the other mappings as we don't need those now), install that into live, and reload live.
Now when I control the knob, Cue Volume, and crossfader are moving.
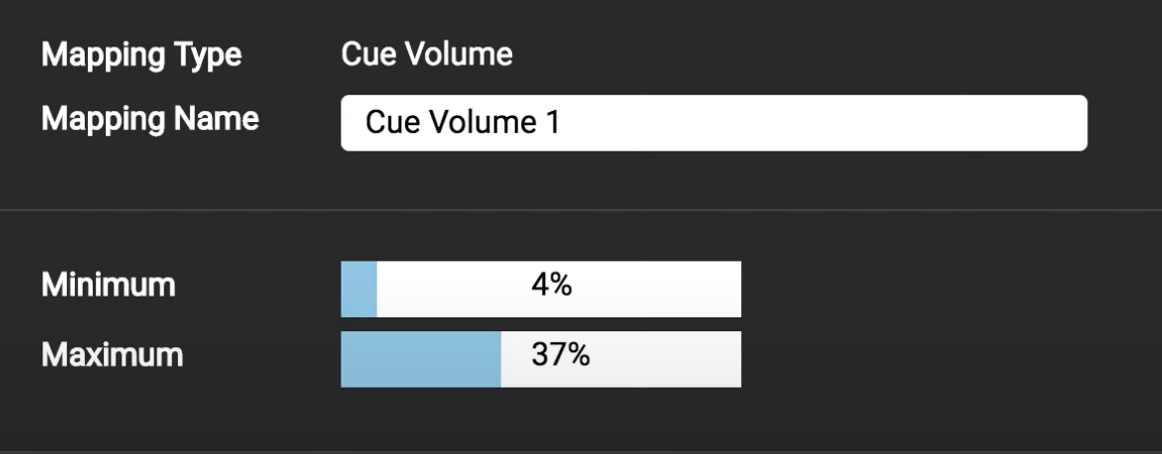
Using Min and Max values with Crossfader and Cue Volume
The other thing you can do with the Crossfader and Cue Volume mapping type is you can use the minimum and maximum values to shorten the range that you're controlling.
So if you wanted to only control a smaller portion of the crossfader or Cue Volume with your knob so that it doesn’t go all the way to the top, or to the bottom, you can make your control bit more granular by changing the minimum and maximum to be shorter.
So let's just set the minimum to 27 percent and maximum to 68 percent on the crossfader and reload live. Now when I move the knob from left to right, the crossfader is staying pretty central.
Using Crossfader and Cue Volume with a button
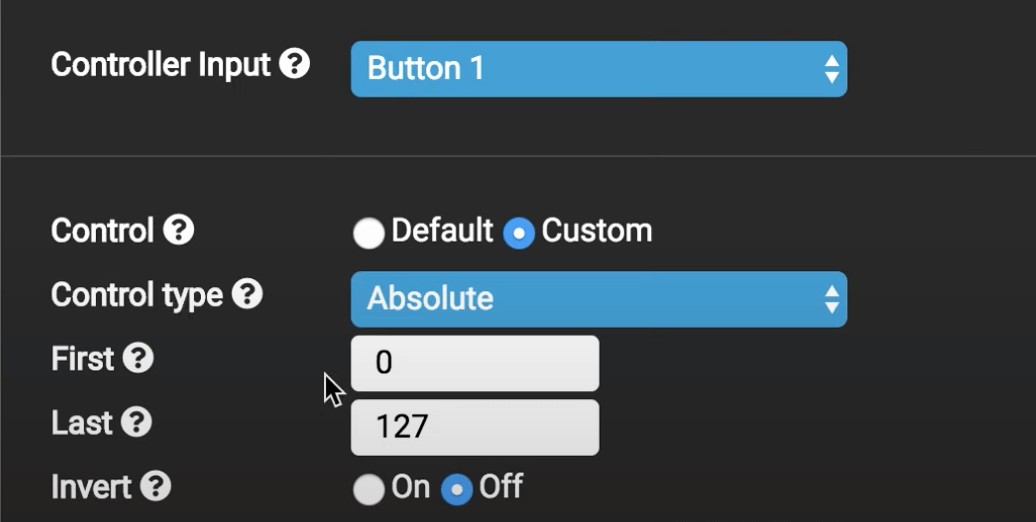
The one other thing you can do with these mapping types (which is the same with all mapping types) is I use a button instead of a knob. To do this I set the control option to “custom”, set control type to “absolute”, make sure the velocity values are correct for the button, do the same for Cue volume. Click Install to save those changes, and reload live.
Now when I press the button on my midi controller, they go from the minimum to the maximum positions, and you can change those positions using the minimum and maximum values. So you could just set them from minimum 0% to maximum 100%, and they will move from top to bottom / left to right.
That's it for this tutorial. Thanks for reading.